
When I was first shopping for wedding dresses I got really discouraged because there were not alot of options with pink accents. And then I bought a dress that was PERFECT, except for its lack of pink.
But then I read this article on OffBeat Bride and saw this on Wedding Bee where the woman dyed her own crinoline and it was AMAZING! So I became determined that I would do the same thing to give it the pop of color my wedding day deserves. So join me for the adventure!
Step One: Obtain Crinoline. This one is actually our test subject. A friend of a friend gifted me what I assume is a pretty expensive one from her local bridal shop (she's my same size) so when I found this one for a few dollars at the thrift store I figured it would be worth ensuring that it was successful BEFORE putting permanent dye on a very expensive piece of fabric.
Step Two: Wash. You usually start with wet items when you dye, so I just didn't put it through the entire spin cycle.
Step Three: Dye. I used RIT fuschia dye. Which I was only able to find at JoAnn Fabrics. For some reason my Hobby Lobby did not carry it. I may try a different dye for my second take, you'll see why in a few.
Step Four: Soak. It said to leave the fabric in the dye (in hot water of course) in for at least 20 minutes, so I put mine in through two cycles of the agitator. I also tried to pull it out and detangle it from time to time, I was completely unsuccessful in this venture and gave up. However, I would highly recommend it because when I took it out it was soo tangled it was nearly impossible to tell what it was.
Step Five: Assess, some parts are pinker than others....
The outside of the garment hardly dyed at all while the inside was the PERFECT shade of fuschia I was going for. I believe this was because the two types of fabric are drastically different. The outside is clearly the nylon and was very slipperly while the inside was your classic tulle and cotton, great for dying. So I think the plan the next time is to find a dye that is more used in the dying of manmade materials.
It's aerosol dye. Now, don't judge me cause I'm killing the environment...THIS IS FOR MY WEDDING! And it was on clearance at Walmart and I can't find anymore so my destruction of Mother Earth is limited.
I would recommend using this stuff in a well ventilated area as it is pretty much translucent spray paint. I pinned mine to my drying rack (don't make fun of me it came in handy this week when our dryer died).
As you can see it did get darker and darker the more coats you put on. However, it was very time consuming and very difficult to get the dye to coat evenly because of all the wrinkles and pleats in the item. If you can I would recommend using a conventional dye, but I'm going to keep this stuff as a backup just in case the item isn't quite pink enough.
But then I read this article on OffBeat Bride and saw this on Wedding Bee where the woman dyed her own crinoline and it was AMAZING! So I became determined that I would do the same thing to give it the pop of color my wedding day deserves. So join me for the adventure!
Step One: Obtain Crinoline. This one is actually our test subject. A friend of a friend gifted me what I assume is a pretty expensive one from her local bridal shop (she's my same size) so when I found this one for a few dollars at the thrift store I figured it would be worth ensuring that it was successful BEFORE putting permanent dye on a very expensive piece of fabric.
 |
| You know its good when it stands all alone |
Step Two: Wash. You usually start with wet items when you dye, so I just didn't put it through the entire spin cycle.
 |
| Scrub-a-dub-dub |
Step Three: Dye. I used RIT fuschia dye. Which I was only able to find at JoAnn Fabrics. For some reason my Hobby Lobby did not carry it. I may try a different dye for my second take, you'll see why in a few.
 |
| Rit Dye |
Step Four: Soak. It said to leave the fabric in the dye (in hot water of course) in for at least 20 minutes, so I put mine in through two cycles of the agitator. I also tried to pull it out and detangle it from time to time, I was completely unsuccessful in this venture and gave up. However, I would highly recommend it because when I took it out it was soo tangled it was nearly impossible to tell what it was.
 |
| It's turning pink! |
Additional Note: Vinegar. Make sure you read the directions on your dye, this one directed me to add vinegar as an acid to assist in the dying of manmade materials (such as the nylon outer shell)
 |
| Acid helps it stick |
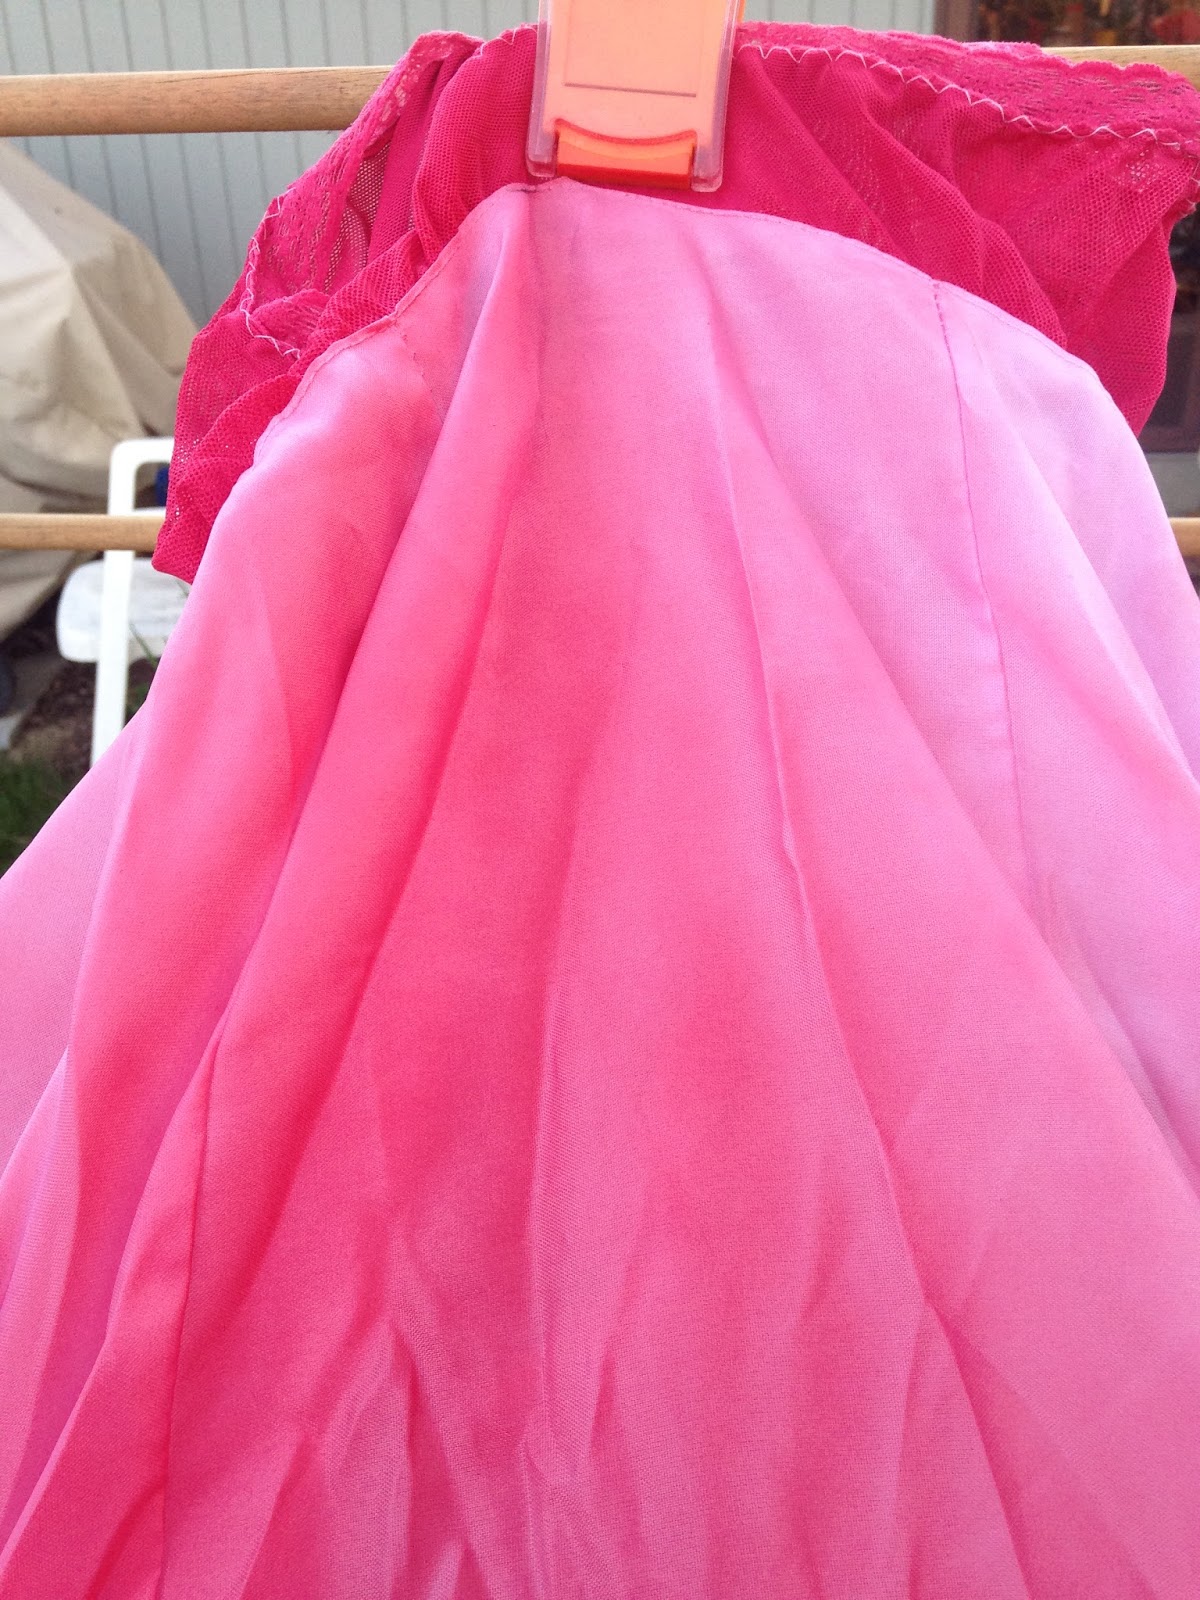
Step Five: Assess, some parts are pinker than others....
|
|


The outside of the garment hardly dyed at all while the inside was the PERFECT shade of fuschia I was going for. I believe this was because the two types of fabric are drastically different. The outside is clearly the nylon and was very slipperly while the inside was your classic tulle and cotton, great for dying. So I think the plan the next time is to find a dye that is more used in the dying of manmade materials.
However....I also found a secondary solution.
 |
| A fun find at Walmart |
It's aerosol dye. Now, don't judge me cause I'm killing the environment...THIS IS FOR MY WEDDING! And it was on clearance at Walmart and I can't find anymore so my destruction of Mother Earth is limited.
 |
| Yes I still own a clothes drying rack |
I would recommend using this stuff in a well ventilated area as it is pretty much translucent spray paint. I pinned mine to my drying rack (don't make fun of me it came in handy this week when our dryer died).
 |
| Before Spray Dying |
|
|


 |
| Third Coat |
As you can see it did get darker and darker the more coats you put on. However, it was very time consuming and very difficult to get the dye to coat evenly because of all the wrinkles and pleats in the item. If you can I would recommend using a conventional dye, but I'm going to keep this stuff as a backup just in case the item isn't quite pink enough.
155 days to go!
Comments