If you know me you know I have a problem...a plants problem. So naturally a greenhouse DIY is the best thing to ever happen to my Pinterest board. The original link I found lead me to Country Living Magazine's tutorial which you can find here. Its pretty good, but doesn't accurately express the amount of frustration which I experienced with this project.
Step 1: Find picture frames
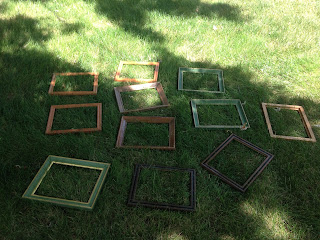
This seems incredibly easy, I decided that it would be simple to just go to our local Dollar Store and get $1 picture frames. The problem: $1 picture frames are not wooden so attempting to nail or screw them results in them falling apart. So then naturally you would just go to the thrift store, but then I was unable to find enough frames in sizes that would create what I was looking for. Finally, I found a large pile of frames while I was at the Habitat ReStore where I could find enough (wood) frames for my purposes.
Step 2: Remove Glass
This seems like a step that does not need listing, but in my case the picture frames I had selected had the piece of art STAPLED to the frame, so not only did I remove the glass of all the frames, I also spent time and curse words removing a gazillion (technical term) staples and those annoying hold-the-picture-in metal bendy things from the frames.
Step 3: Build a House
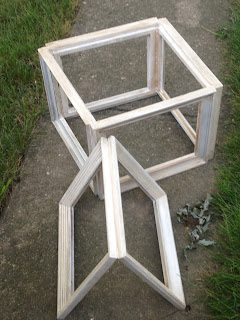
The Country Living Magazine example drills holes and uses screws, but I was having trouble holding them all together that way, so I bought L brackets to put the sides together. I then used a small hinge to attach the roof. In one of the examples I gave my roof to steep of a pitch for the roof to hinge the way I wanted, so I skipped it entirely and decided to just allow the roof to sit loosely on top. I also decided to go without the triangle pieces they added in the Country Living example, mostly because I was lazy, but I also liked the idea of keeping lots of air flow in for my plant friends.
Step 4: Paint
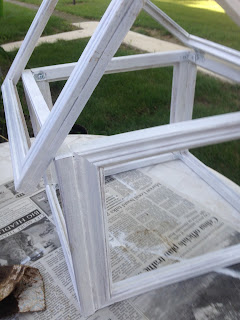
I actually made the mistake of spray painting my frames BEFORE putting them together. After I put them together I ended up filling in some extra screw holes I created when I moved the roof over (I didn't think it was centered at first) so of course, it was the wrong color, so I ended up painting the whole thing again. I didn't have any white paint so I just bought a sample size white paint from the hardware store.
Step 5: Antique
The paint sample I bought turned out to be WHITE. It didn't really give the worn feel I was going for so I took some old stain I had and antiqued the surfaces. At first I was putting a thick layer of stain on and then wiping it off to leave a residue, but as more and more stain soaked into my rag I was able to just rub my rag onto the frames for a nice rustic effect.
Step 6: Return Glass
I did a layer of E-6000 epoxy on the ledge where the glass sits and then "sealed" them in with another layer along the inside of the glass just to be certain.
Step 7: Enjoy!
 |
| Pulling out soooo many staples |
Step 3: Build a House
The Country Living Magazine example drills holes and uses screws, but I was having trouble holding them all together that way, so I bought L brackets to put the sides together. I then used a small hinge to attach the roof. In one of the examples I gave my roof to steep of a pitch for the roof to hinge the way I wanted, so I skipped it entirely and decided to just allow the roof to sit loosely on top. I also decided to go without the triangle pieces they added in the Country Living example, mostly because I was lazy, but I also liked the idea of keeping lots of air flow in for my plant friends.
 |
| All you need to build a house is a square and triangle |
Step 4: Paint
I actually made the mistake of spray painting my frames BEFORE putting them together. After I put them together I ended up filling in some extra screw holes I created when I moved the roof over (I didn't think it was centered at first) so of course, it was the wrong color, so I ended up painting the whole thing again. I didn't have any white paint so I just bought a sample size white paint from the hardware store.
 |
| Painting on my patio table |
Step 5: Antique
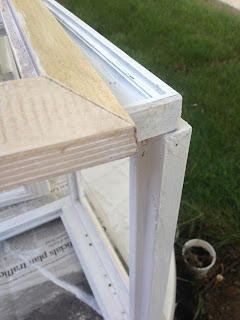
The paint sample I bought turned out to be WHITE. It didn't really give the worn feel I was going for so I took some old stain I had and antiqued the surfaces. At first I was putting a thick layer of stain on and then wiping it off to leave a residue, but as more and more stain soaked into my rag I was able to just rub my rag onto the frames for a nice rustic effect.
 |
| Here's the difference a little antiquing makes |
Step 6: Return Glass
I did a layer of E-6000 epoxy on the ledge where the glass sits and then "sealed" them in with another layer along the inside of the glass just to be certain.
 |
| Glass goes back in |
Step 7: Enjoy!


Comments